In this post, let’s see how to quickly transfer files from your iPhone/iPad to a hard drive.
Transfer Files from iPhone to NAS Drive
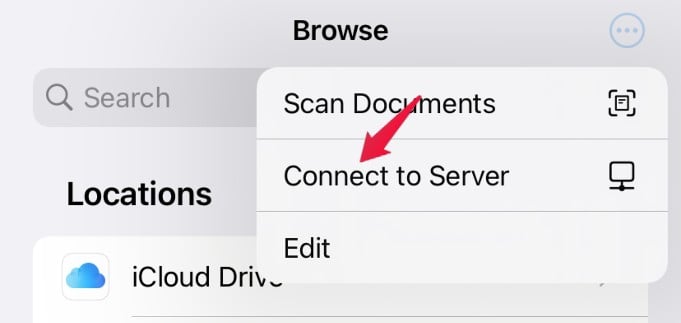
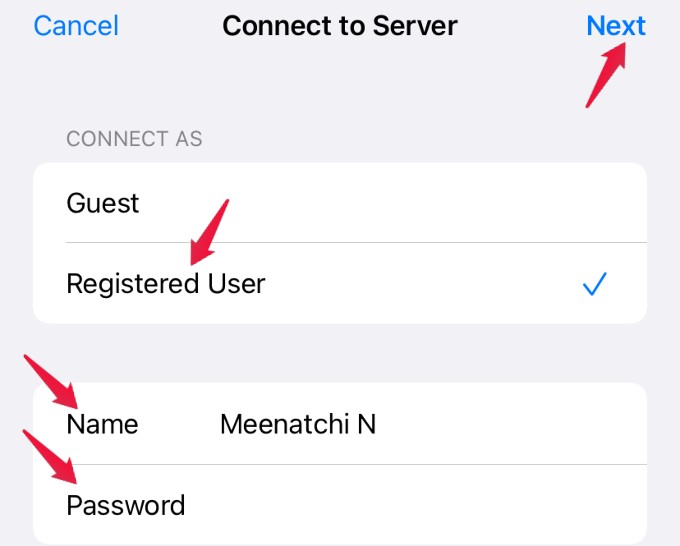
If your external hard drive is a NAS (Network Attached Storage) device, you can connect it directly to your home Wi-Fi network. Then, you can directly transfer files from your iPhone to the hard drive without using a computer. Let’s see how to do that. Before starting, make sure your NAS hard drive and iPhone are connected to the same Wi-Fi network. Next, make a note of the IP address of your hard drive. Open Files app on your iPhone and tap the three-dot icon at the top right. Next, tap Connect to Server. In the new screen and enter smb:// followed by the IP address of the drive and tap Connect on the top right. Then, on the next screen, tap Registered User and type username and password. Finally, tap Next. Now, you should be able to access the folders on your NAS hard drive and can transfer the files from your iPhone.
Transfer Files from iPhone to External Hard Drive Using Windows
You don’t have a NAS drive, but a normal USB Hard drive? No worries. Still, you can transfer the photos and videos from your iPhone to an external hard drive using the Photos app on your computer running Windows 10 or later. First, connect your external hard drive to the computer. Next, connect your iPhone to your Windows computer using a USB cable. Once the devices are connected, Windows Photos app will automatically open and start importing pictures and videos from your iPhone. After the import process is completed, you will see the screen titled Import Items. Here, click Change Destination. Next, in the Select Folder window, select the folder on the external hard drive to save the files from your iPhone. Now, you can import all files by selecting All Items in the drop-down box Select. Or if you want to transfer only certain files, then you can select the files by clicking on the thumbnails. Once you are done selecting photos and videos, click the Import button to transfer files from your iPhone to the external hard drive.
Transfer iPhone Files to External Hard Drive Using Mac
If you are a Mac user, you can use the Image Capture app to transfer files from your iPhone to an external hard drive. Let’s see how to do that. First, connect your iPhone to your Mac using the cable. If you are connecting the devices for the first time, you will be asked to enter the passcode and provide confirmation to trust the computer. Then, open Image Capture on Mac and select your iPhone in Devices. Here, you will see the thumbnails of the images stored on your iPhone. Below that, you will see the option Import To. By default, the images will be imported to the Pictures folder. Click that menu and change the destination folder to your external hard drive. To transfer all images from iPhone, click Download All. Or if you want to transfer only certain images, then select those thumbnails and click Download button.
Transfer Files Directly from iPhone to Hard Drive
If you don’t wish to use a computer, you can connect the USB-based external hard drive directly to your iPhone. However, you might need a Lightning-to-USB or Lightning-to-USB 3 camera adapter to connect the devices. Once the devices are connected, you can access the hard drive from the Files app by tapping Browse on the bottom right of the screen. Then, you can easily transfer photos, videos, or any other documents from your iPhone to the hard drive.
Δ